We were invited to Sunday lunch today at our friend's house (thanks Simon and Louisa!) and I offered to make dessert. I'm normally a cheesecake kinda girl but decided to opt for something a little bit different. I'd seen a Mary Berry recipe for a lemon pavlova that featured on the Easter Great British Bake Off Masterclass special. Now I will admit that despite my love of baking I have:
a) Never made a Mary Berry recipe (shocking I know)
b) Never made a pavlova or anything remotely meringue based
so I have to say I was a little worried yesterday afternoon that it would all go a little bit pear-shaped but I'm happy to say it was all OK in the end.
You can find the recipe
here. It's meant to be an Easter pavlova but I decided to leave out the chocolate mini eggs as we're now past the Easter weekend.
The ingredients are pretty basic:
For the meringue:
6 free-range egg whites
350g caster sugar
2 tsp white wine vinegar (I didn't have any so improvised with 2 tsp of lemon juice)
2 level tsp cornflour
For the lemon curd filling:
6 free-range egg yolks
350g caster sugar
4 lemons (I only used 3 and it still tasted lemony enough)
225g butter
450ml double cream (I only used 300ml and found this to be plenty)
For the candied lemon peel:
100g caster sugar (plus extra for coating)
4 lemons, zest only (in long thin strips - as above I only used 3)
Method:
1. Preheat the oven to 160C/325F/Gas 3. Lay a piece of baking paper on a baking tray and draw a 25cm/10in circle on it.
2. Put the egg whites into a bowl and whisk on the fastest speed with an electric hand-whisk or in a free-standing mixer until stiff (it takes a while and you need to be patient. I wouldn't recommend whisking by hand!) Gradually, still whisking on maximum speed, add generous teaspoons of sugar until the mixture is stiff and shiny and stands in peaks.
3. Blend the vinegar and cornflour together (as I mentioned in the ingredients I used 2 tsp of lemon juice instead) in a cup and mix until smooth. Stir this into the meringue mixture. Your mixture should then look a little bit like this:
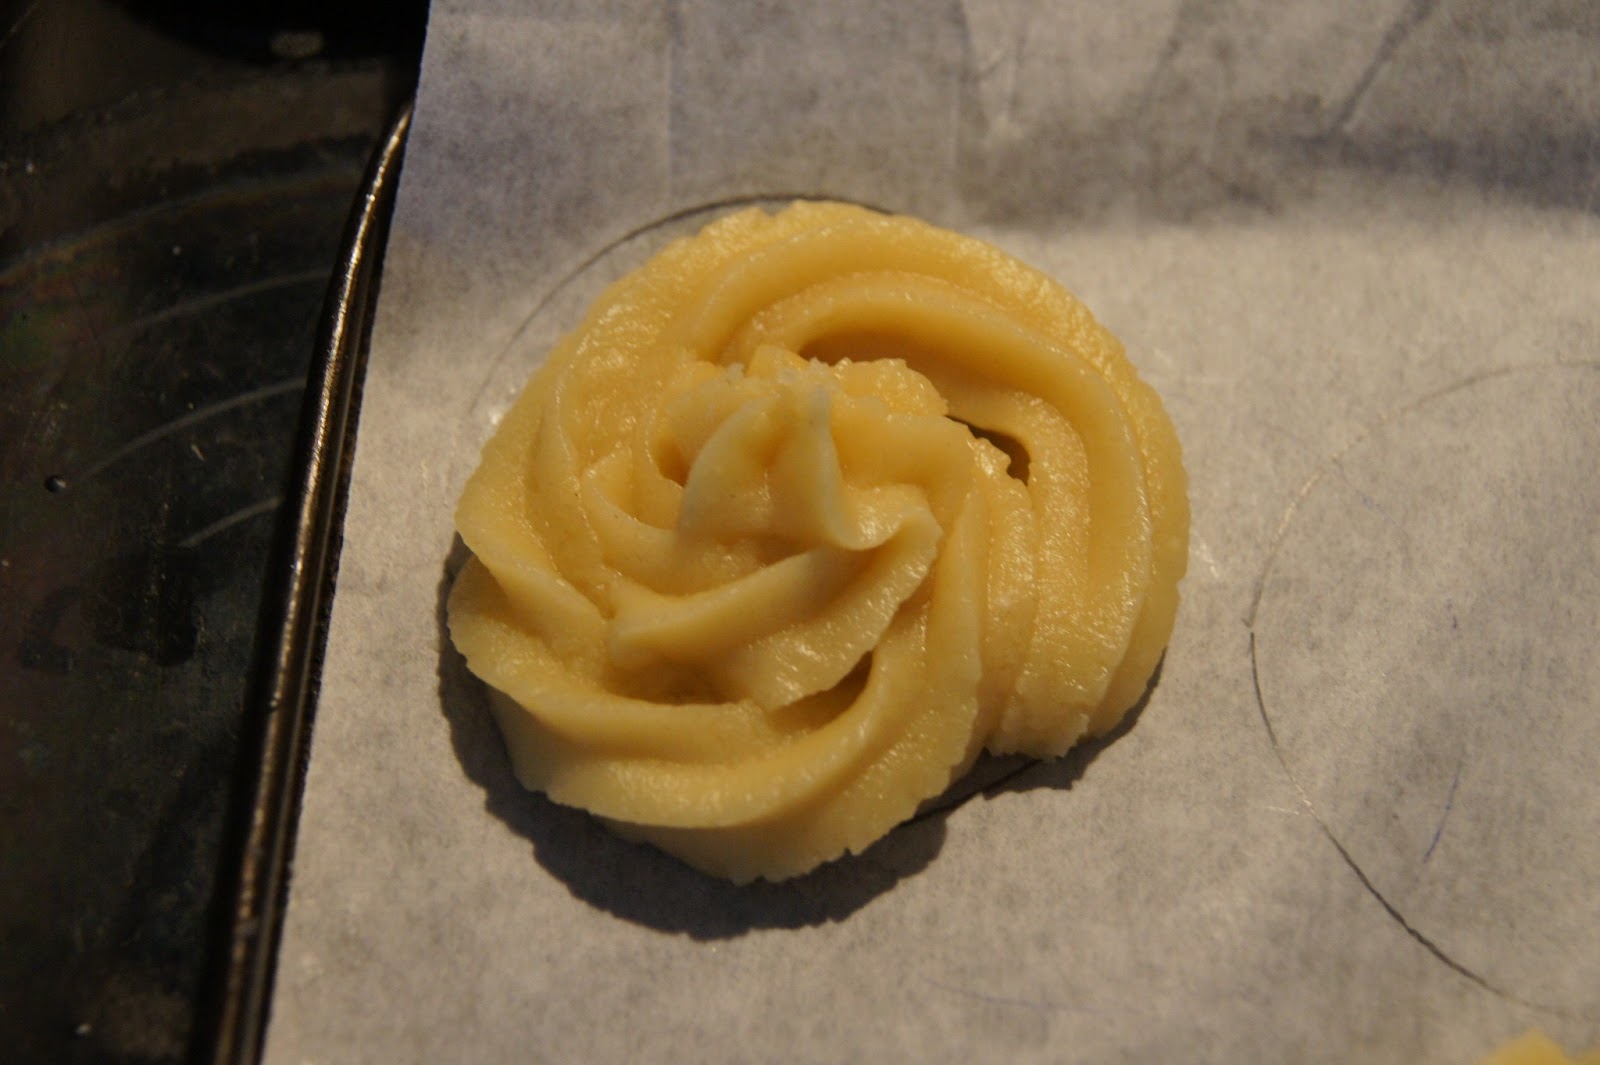
4. Spread half the meringue mixture onto the paper to fit the 25cm/10in circle. Fill a piping bag, fitted with a rose nozzle, with the rest of the meringue mixture. Carefully pipe about 10 separate little nests positioned equally around the edge of the circle (I only piped 8 and as I wasn't going to use the eggs I went for peaks rather than nests. It should then look a little bit like this...
5. Slide the meringue into the middle of the oven, turn the heat down to 150C/300F/Gas 2 and bake for 1 1/2 - 2 hours (checking after one hour), or until it easily comes off the paper (mine only needed 1 1/4 hours). The pavlova will be a pale creamy colour rather than white (something a little bit like this...)
As you can see I had some major cracking issues - but as this is the first time I've made a pavlova it's something for me to work on!
6. Meanwhile you need to make the lemon curd for the filling. In theory and according to the recipe you are meant to place a heatproof bowl over a pan of hot water that is simmering gently on a stove/hob. You add the egg yolks, sugar and lemon juice to the bowl and whisk. Gradually add the butter, whisking continually until it starts to thicken. It should coat the back of a spoon when it reaches the correct consistency and will firm up further once cooled. This is how it looks before heating...

Now this is where it all went wrong. After half an hour of whisking my lemon curd was still the same consistency as at the start and was not looking like it was going to thicken at any point. After a little Internet research I decided to give microwaving a go. I'd read that 1 minute intervals followed by whisking was recommended. After about 4 minutes in the microwave I eventually had something that resembled lemon curd (in hindsight I think I underestimated just how much it would thicken and could probably only have microwaved it for 3 minutes.)
7. Whisk the double cream in a large bowl, until thickened, then swirl it through the cooled lemon curd. (I failed here too - my lemon curd thickened beyond belief so instead of swirling I had to mix it altogether so lost any swirling effect. I'm sure it still has the same taste!) I also didn't use all the lemon curd as it makes a lot. Instead I will be enjoying it on toast for my breakfast!
8. Spoon the lemon curd and cream mixture into the middle of the pavlova and spread over the base of the meringue nest.
9. To make the candied lemon peel for the top you put 100ml water and the caster sugar in a pan. Bring to the boil, stirring. Add the zest and boil for 2-3 minutes, or until syrupy. Drain on parchment paper, roll in extra caster sugar and leave to dry in a warm place for a couple of hours, or overnight.
My finished pavlova ended up looking like this...(as you can see the cracks ended up getting a lot worse!) I can highly recommend it - despite looking a bit monstrous it was in fact surprisingly light.
I will definitely try making another pavlova in the future.
Happy baking!