Sunday, 23 June 2013

Rocky Road


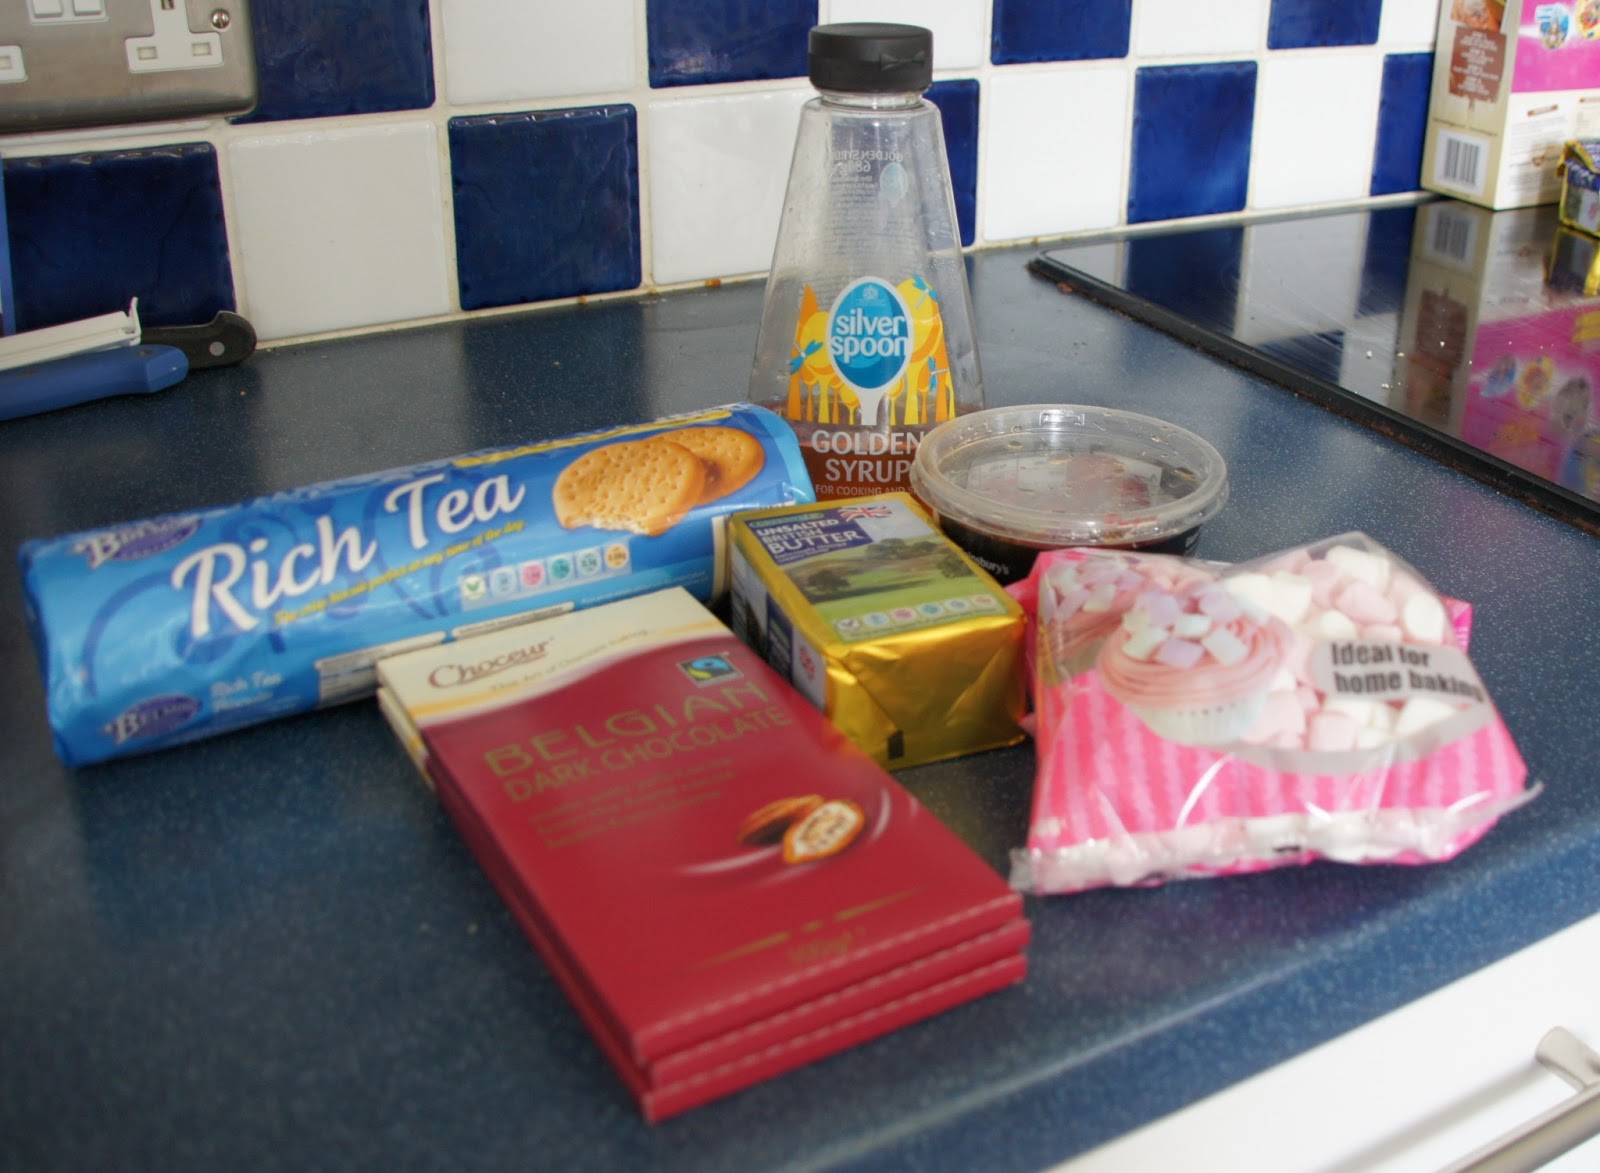
As a teacher the summer term is normally my favourite time of year. Sunshine, sports days, less stress, the count down to the summer holidays. Unfortunately it's not quite working out like that at the moment. It's been a busy few weeks so I thought I whip up a batch of rocky road to keep us all going. I also made some banana muffins but these were an EPIC failure (both in looks and taste) so I'm not even going to post them (yes, they really were that bad!)

My introduction to rocky road came about 6 years ago when I used to work with a teacher who made THE most amazing cakes. She would make a batch of rocky road which she'd bring in and they would be gone in minutes. We were pretty much obsessed with them in the staff room and they were always requested. This was my first attempt and I think future attempts will need a little refining. The beauty of it is that it requires no baking. When you look at recipes on the Internet you will find all sorts of different versions with different ingredients. The combinations and possibilities are endless. Do you go for rich tea biscuits or digestives? Milk chocolate, dark chocolate or both? Fruit or no fruit? Nuts or no nuts? I opted for a simple Nigella recipe from the BBC website that you can find here. There is also a Christmas version as well. I decided to add some glace cherries as I had some that needed using up - Mr Birdie was not keen on these and has advised me that in future raisins would be a better addition (this has been noted!)

Ingredients:


125g unsalted soft butter
300g dark chocolate, broken into pieces
3 tbsp golden syrup
200g rich tea biscuits
100g mini marshmallows
150g glace cherries (optional extra)
2 tsp icing sugar, to dust

Method:
1) Heat the butter, chocolate and golden syrup in a heavy-based saucepan over a gentle heat.


Once melted, remove from the heat, scoop out about 125ml of the melted mixture and set aside in a bowl/jug.
2) Place the biscuits into a freezer bag and crush them with a rolling pin until some have turned to crumbs but there are still some pieces of biscuits remaining (this can be very therapeutic!)
3) Fold the biscuit pieces and crumbs into the melted chocolate mixture in the saucepan, then add the marshmallows and the cherries.


4) Tip the mixture into a 24cm/9in square baking tin and smooth the top with a wet spatula.


5) Pour over the reserved 125ml of the melted chocolate mixture and smooth again.


6) Refrigerate for about two hours or overnight.
7) To serve, cut into 24 gingers and dust with icing sugar and enjoy!


Sunday, 16 June 2013

Father's Day Cheesecake - Baked Rhubarb Cheesecake

Apologies that it has been a little quiet on the blog - I didn't realise it was over a month since I had last posted. Our weekends have been hectic due to concerts, babysitting, barbecues and tidying and packing for our forthcoming house move (fingers crossed).

Today is Father's Day so happy Father's Day to any dads reading the blog - I hope you are enjoying your day. My Dad is coming to visit so it was desert making time yesterday. My Dad is a big fan of cheesecake so I decided this was the obvious choice. I am big fan of rhubarb (which is currently 69p in Aldi as part of their 'Super Six' offer - bargain!) and picked some up during our weekly shop and decided it was time to combine the two. I did consider trifle but I don't have a trifle bowl. I originally found a Delicious Magazine recipe for a baked rhubarb and orange cheesecake which looked good but served 12-16 and required 900g of cream-cheese which seemed a little extravagant for just three people! I found a recipe on the BBC website for a baked rhubarb and ginger cheesecake that served 8 and seemed a little less extravagant. You can find the recipe here although as you will see I'm not sure this is necessarily a recipe I would recommend!

Ingredients:


1.5 kg rhubarb, trimmed
175g caster sugar
300g stem ginger biscuits (I used ordinary ginger biscuits)
115g unsalted butter, melted
450g full-fat cream cheese
2 lemons, zest only
300ml soured cream
6 eggs separated
1 tbsp icing sugar

Method:
1) Preheat the oven to 200C/400F/Gas 6. Grease and line and 25cm/10in loose-bottomed cake tin.
2) Cut two thirds (1kg) of the rhubarb into pieces about 5cm/2in long, place in an ovenproof dish and sprinkle with 55g of the caster sugar. Roast in the oven for 20 minutes or until tender.


3) Meanwhile, cut the remaining rhubarb into pieces about 7.5cm/3in long, place in another ovenproof dish with a tablespoon of the caster sugar and roast until just tender but still holding their shape. Set aside to decorate the cheesecake.


4) To make the biscuit base, place the biscuits in a plastic bag and crush with a rolling pin leaving the mixture quite rough. Place the biscuit crumbs in a bowl, mix in the melted butter and press into the bottom of your prepared cake tin. Place in the fridge while you make the cheesecake mixture (I forgot to do this - oops!)


5) Beat the cream cheese with the remaining 125g caster sugar and the lemon zest, then add the soured cream and egg yolks and beat until smooth.

6) Spread the rhubarb onto the chilled biscuit base (if you've remembered to chill it!) Whisk the egg whites until they hold soft peaks then fold into the cheese mixture and pour on top of the rhubarb. My rhubarb after it baked was quite watery. In hindsight I think I would have benefited from trying to drain some of the liquid away as the base of the cheesecake was very watery and leaked during baking and afterwards. I also didn't use all the rhubarb as otherwise the tin would have been half full before add the mixture. 


7) Bake in the oven for about one hour, reducing the heat to 180C/350F/Gas 4 once the cheesecake has risen. The top should be firm to the touch but still slightly wobbly. Leave the cheesecake to cool then remove it from the tin. The baking is where it all went wrong. It dramatically rose (it resembled more of a souffle than a cheesecake) and formed a not so nice layer/crust on the top. It did sink as it cooled down but the texture was not nice (Mr Birdie called it a rhubarb omelette rather than a cheesecake!) After it came out of the tin it looked hideous so that's why there are no photos of the whole thing - it really did look disastrous. I decided to leave it in the fridge overnight to see what state it was in the next day.
8) Arrange the reserved rhubarb on top and dust with the icing sugar.


As you can see it wasn't too bad in the end - I managed to salvage three slices for lunch today. I think if I try a rhubarb cheesecake again I will investigate one that mixes the fruit with the cheese.

Happy baking (and Father's Day!)
Dil :-)


Saturday, 11 May 2013

Therapy Time - Oat and Raisin Cookies


It has been a stressful week in the Little Birdie kitchen and an even more stressful Saturday. Why does buying a house have to be such a horrendous experience? In an attempt to take my mind off things things I decided to make some cookies. Before Christmas I went on a cookie making splurge but haven't really made any since. This is a Hummingbird Bakery recipe from The Hummingbird Bakery Cookbook. I have made them twice before for work colleagues and they have always been well received. Plus they've got raisins and oats in them so surely they must be healthy? I'm currently enjoying one with a mug of warm milk before bed! This recipe makes 20ish (depending on how big or small you like your cookies - I managed to make 21 with this batch).

Ingredients:


270g unsalted butter (room temperature)
160g caster sugar
160g soft dark brown sugar (I only had 50g of this so made the rest up with soft light brown sugar and they this worked as well)
2 eggs
1/4 teaspoon vanilla extract
380g plain flour
1 teaspoon salt
1 teaspoon bicarbonate of soda
1/2 teaspoon ground cinnamon
110g rolled oats
220g raisins

Method:
1) Preheat the oven to 170C/325F/Gas 3 and line 4 baking sheets with greaseproof paper.
2) Put the butter and sugars in a large bowl and mix (using an electric handwhisk - alternatively use a freestanding electric mixer) until light and fluffy. Add the eggs one at a time, mixing well and scraping any unmixed ingredients from the side with a rubber spatula. Add the vanilla extract and mix on the lowest speed until combined.


3) In a separate bowl sift the flour, salt, bicarbonate of soda and cinnamon. Add the oats and mix well. Add to the butter mixture and beat until well mixed (I use a wooden spoon at this point). Stir in the raisins until evenly dispersed.


4) Arrange equal amounts of cookie dough on the lined baking trays making sure they are equally spaced apart to allow for spreading. Bake in the oven for 12-15 minutes until golden brown. They will firm up when taken out of the oven so if they still seem squishy don't worry too much. Remove from the oven and leave to cool slightly on the trays before turning out onto a wire cooling rack to cool completely.


5) Enjoy...with the drink of your choice!


Sunday, 21 April 2013

Having a cracking time - Nigella's Chocolate Raspberry Pavlova


We had our friends Emma and John over for Sunday lunch today so it was time to try a new dessert. The lovely Emma is pregnant so that meant cheesecake was out. I am a bit scared of tarts (pastry - eek!) so decided that following the success of my previous pavlova it was time to try a different pavlova. I have been wanting to try Nigella's cappuccino pavlova that featured in her Nigellissima Christmas special last year (you can find the recipe on the BBC website here or on her website here) but decided that as the sun was shining maybe something a little bit more summery/spring-like was required. After a bit of research I found Nigella's recipe for chocolate raspberry pavlova and decided that this was the recipe to try. It's from her Forever Summer book and can be found on her website here.

Ingredients:


For the chocolate meringue base:
6 large egg whites
300 grams caster sugar
3 tablespoons cocoa powder (sieved)
1 teaspoon balsamic vinegar (or red wine vinegar)
50 grams dark chocolate (finely chopped)

For the raspberry and cream topping:
500 ml double cream
500 grams raspberries
3 tablespoons dark chocolate (coarsely grated)

Method: 
1) Preheat the oven to 180C/gas mark 4 and line a baking tray with baking parchment. Using a plate (or ruler) draw a fat circle (approximately 23cm in diameter) onto the paper ready for the meringue,
2) Using an electric whisk or free-standing mixer beat the egg whites until satiny peaks form (Now here I ran into trouble - my egg whites just didn't do what I wanted them to do. I had separated the eggs, wiped and washed the bowl but sadly my confidence evaporated as I was left with a foamy blob rather than satiny peaks! I can only think some rogue egg yolk had sneaked its way in. I persevered anyway but think my meringue suffered.)
3) Beat in the caster sugar a spoonful at a time until the meringue is stiff and shiny. Sprinkle over the cocoa, vinegar and the chopped chocolate and carefully fold in.


4) Mould on to a baking sheet in a fat circle to fit the 23cm circle drawn on the baking parchment. Smooth the sides and top. (As my meringue wasn't quite right this was quite tricky. This was what mine looked like before it went in the oven.)


5) Place in the oven, then immediately turn the temperature down to 150C/ gas mark 2 and cook for about 1 - 1 1/4 hours. When it's ready it should look crisp round the edges and on the sides and be dry on top. When you prod the centre it should feel slightly squidgy. Turn off the oven, leave the door slightly open and leave the meringue to cool completely. As you can see I had some serious cracking issues. I'm not sure what I am doing wrong but I have had this problem twice now - it was cracking during the cooking rather than afterwards. I thought that it might fall apart completely but luckily it held together. If anyone can shed any light on why I am such major cracking issues I'd be very grateful!


6) When you're ready to serve, invert it onto a large plate (ideally flat-bottomed). Whisk the cream until thick but still soft and pile it on top of the meringue, then scatter over the raspberries. Coarsely grate the chocolate over the top and sprinkle over.
7) Enjoy! It is delicious and was a big hit. The meringue is chewy and the cream and raspberries are the perfect topping. I would definitely recommend and make this again.


Happy baking,

Dil :-)

Saturday, 20 April 2013

Berlin

Hello to everyone who has taken a look at the blog. I'm not sure where you've all come from but thank you - I hope you like what you see!

Apologies for it all going a little quiet on the blog front...I spent last weekend in Berlin with Mr Birdie (a.k.a. my husband Rob). Berlin was great, if not a little wet. It is a fantastic city and I would definitely recommend visiting and taking in some of the sights. We spent a lot of time eating and drinking coffee. A highlight for me was indulging in cheesecake for breakfast at Princess Cheesecake (http://www.princess-cheesecake.de/) a cafe dedicated entirely to cheesecake! We also tried a burger cooked in a former toilet (http://www.burger-meister.de/) an interesting experience! Below are some foodie shots captured on my phone (apologies for the quality of the photos - we took Mr Birdie's SLR camera with us but sadly forgot the battery - oops!)

I am in the process of baking this weekend so promise a new recipe post tomorrow :-)


Monday, 8 April 2013

Chocolate Orange Cupcakes


This is a belated post as I originally made these a couple of weeks ago. One of my previous headteacher's has just retired and the school held an afternoon tea as a celebration. I was asked to make some cakes (as it turned out they weren't required much to the delight of the staff at my current school - they went down well on the last day of term when chocolate and sugar were very much needed!)

These were made in a rush on a Tuesday night so I haven't got step-by-step photos but I will post the recipe should anyone be interested in making them. I openly admit that I find cupcakes tricky. I never seem to be able to get them light and fluffy enough - one day I'm sure I'll succeed! If anyone has any tips I'd be very grateful! I used a Primrose Bakery recipe from the Cupcakes From the Primrose Bakery book.

Ingredients (Makes about 12-16 cupcakes depending on how much you fill your cases):

For the chocolate orange cupcakes:
115g good-quality dark chocolate
90g unsalted butter (I used Stork)
175g caster sugar (I used golden)
Grated zest and juice of 1 orange (75ml of juice)
2 large eggs
185g plain flour, sifted
1/2 teaspoon bicarbonate of soda
1/2 teaspoon baking powder
1/2 teaspoon salt
1 tablespoon semi-skimmed milk (room temperature)

For the chocolate buttercream:
175g good-quality dark chocolate
225g unsalted butter (room temperature)
1 tablespoon semi-skimmed milk (room temperature)
1 teaspoon vanilla extract
250g icing sugar, sifted

For decoration:
1 Terry's Chocolate Orange (Milk or dark chocolate - you decide!)

Method:
Begin by making your cupcakes first

1) Preheat the oven to 160C(fan)/180C/350F/gas mark 4 and line a 12-hole muffin tray with cupcake cases.

2) Break the chocolate into pieces and melt using your preferred method (30-second bursts in a microwave or a heatproof bowl over simmering water - I always prefer to melt chocolate over simmering water). Once melted set the bowl aside to cool.

3) In a large mixing bowl cream the butter, sugar and orange zest until the mixture is pale and smooth (this should take 3-5 minutes using an electric whisk). Add the eggs and beat again briefly.

4) Combine the flour, bicarbonate of soda, baking powder and salt in a bowl. Mix the milk and orange juice in a jug.

5) Add the chocolate to the creamed mixture and beat on a low speed until the mixture is just combined. Add one-third of the flour mix and beat until it all just comes together. Add half the juice/milk mix and beat again until the mixture just comes together  Repeat until all the ingredients are mixed together (I found the mix to be quite heavy - not runny).

6) Carefully spoon the mixture into the cupcake cases, filling them about two-thirds full. Bake in the over for 28-30 mins (check after about 25). Check they are cooked by inserting a cocktail stick or skewer into the centre - it should come out clean.

7) Remove from the oven and leave the cakes in their tins for about 10 minutes before placing on a wire rack to cool completely. While the cupcakes are cooling you can make the chocolate buttercream icing.

8) To make the icing begin by melting the chocolate (using the method of your choice as described above). Once melted leave it to cool slightly.

9) In a large mixing bowl beat the butter, milk, vanilla extract and icing sugar until smooth - this can take a while using an electric hand mixer and can also cover your kitchen in a cloud of icing sugar! Add the melted chocolate and beat again until thick and creamy.

10) Pipe or swirl onto your cupcakes (I went for 99/Mr Whippy style icing) and decorate with a segment of Terry's Chocolate Orange.

11) Enjoy!


Sunday, 7 April 2013

Pav-tastic - Mary Berry's Lemon Pavlova


We were invited to Sunday lunch today at our friend's house (thanks Simon and Louisa!) and I offered to make dessert. I'm normally a cheesecake kinda girl but decided to opt for something a little bit different. I'd seen a Mary Berry recipe for a lemon pavlova that featured on the Easter Great British Bake Off Masterclass special. Now I will admit that despite my love of baking I have:
a) Never made a Mary Berry recipe (shocking I know)
b) Never made a pavlova or anything remotely meringue based
so I have to say I was a little worried yesterday afternoon that it would all go a little bit pear-shaped but I'm happy to say it was all OK in the end.

You can find the recipe here. It's meant to be an Easter pavlova but I decided to leave out the chocolate mini eggs as we're now past the Easter weekend.

The ingredients are pretty basic:


For the meringue:
6 free-range egg whites
350g caster sugar
2 tsp white wine vinegar (I didn't have any so improvised with 2 tsp of lemon juice)
2 level tsp cornflour

For the lemon curd filling:
6 free-range egg yolks
350g caster sugar
4 lemons (I only used 3 and it still tasted lemony enough)
225g butter
450ml double cream (I only used 300ml and found this to be plenty)

For the candied lemon peel:
100g caster sugar (plus extra for coating)
4 lemons, zest only (in long thin strips - as above I only used 3)

Method: 
1. Preheat the oven to 160C/325F/Gas 3. Lay a piece of baking paper on a baking tray and draw a 25cm/10in circle on it.
2. Put the egg whites into a bowl and whisk on the fastest speed with an electric hand-whisk or in a free-standing mixer until stiff (it takes a while and you need to be patient. I wouldn't recommend whisking by hand!) Gradually, still whisking on maximum speed, add generous teaspoons of sugar until the mixture is stiff and shiny and stands in peaks.
3. Blend the vinegar and cornflour together (as I mentioned in the ingredients I used 2 tsp of lemon juice instead) in a cup and mix until smooth. Stir this into the meringue mixture. Your mixture should then look a little bit like this:


4. Spread half the meringue mixture onto the paper to fit the 25cm/10in circle. Fill a piping bag, fitted with a rose nozzle, with the rest of the meringue mixture. Carefully pipe about 10 separate little nests positioned equally around the edge of the circle (I only piped 8 and as I wasn't going to use the eggs I went for peaks rather than nests. It should then look a little bit like this...


5. Slide the meringue into the middle of the oven, turn the heat down to 150C/300F/Gas 2 and bake for 1 1/2 - 2 hours (checking after one hour), or until it easily comes off the paper (mine only needed 1 1/4 hours). The pavlova will be a pale creamy colour rather than white (something a little bit like this...)


As you can see I had some major cracking issues - but as this is the first time I've made a pavlova it's something for me to work on!

6. Meanwhile you need to make the lemon curd for the filling. In theory and according to the recipe you are meant to place a heatproof bowl over a pan of hot water that is simmering gently on a stove/hob. You add the egg yolks, sugar and lemon juice to the bowl and whisk. Gradually add the butter, whisking continually until it starts to thicken. It should coat the back of a spoon when it reaches the correct consistency and will firm up further once cooled. This is how it looks before heating...


Now this is where it all went wrong. After half an hour of whisking my lemon curd was still the same consistency as at the start and was not looking like it was going to thicken at any point. After a little Internet research I decided to give microwaving a go. I'd read that 1 minute intervals followed by whisking was recommended. After about 4 minutes in the microwave I eventually had something that resembled lemon curd (in hindsight I think I underestimated just how much it would thicken and could probably only have microwaved it for 3 minutes.)

7. Whisk the double cream in a large bowl, until thickened, then swirl it through the cooled lemon curd. (I failed here too - my lemon curd thickened beyond belief so instead of swirling I had to mix it altogether so lost any swirling effect. I'm sure it still has the same taste!) I also didn't use all the lemon curd as it makes a lot. Instead I will be enjoying it on toast for my breakfast!

8. Spoon the lemon curd and cream mixture into the middle of the pavlova and spread over the base of the meringue nest.

9. To make the candied lemon peel for the top you put 100ml water and the caster sugar in a pan. Bring to the boil, stirring. Add the zest and boil for 2-3 minutes, or until syrupy. Drain on parchment paper, roll in extra caster sugar and leave to dry in a warm place for a couple of hours, or overnight.


My finished pavlova ended up looking like this...(as you can see the cracks ended up getting a lot worse!) I can highly recommend it - despite looking a bit monstrous it was in fact surprisingly light.


I will definitely try making another pavlova in the future.

Happy baking!